September 19, 2026 Post by : Editorial Balloon Decor
Garland Storage and Reuse: How to Keep Your Decor for Next Year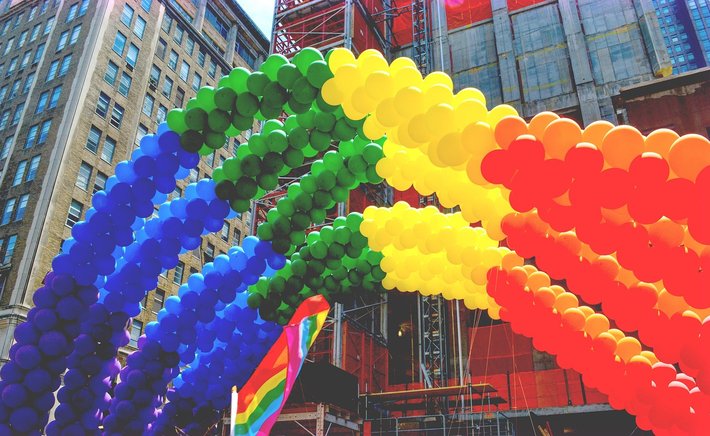
Balloon arches look effortless in photos, but anyone who has wrestled with a wobbly cluster ten minutes before guests arrive knows the truth: structure matters more than color scheme. The good news is that a reliable arch doesn't require professional equipment or a helium tank. With a few inexpensive supplies and a bit of patience, you can build something that holds its shape from the first guest to the last slice of cake.
Start by deciding where the arch will live. Doorways, dessert tables, and photo corners are the classic choices, but the surface underneath matters. A freestanding arch needs weight at the base, so plan for a sturdy frame or a weighted anchor. If you're attaching to a wall, removable hooks designed for damage-free hanging will save your paint. Measure the height and width before buying anything, and add a little extra length so the arch can curve naturally instead of stretching tight.
Choosing Balloons and Building the Base
Latex balloons in two or three sizes create the organic, clustered look that reads well in photos. A mix of 5-inch, 9-inch, and 11-inch balloons gives you variety without chaos. Stick to a palette of three to four colors, and include a neutral like white, cream, or gold to break up the saturation. If you want the arch to feel cohesive, repeat the same palette in your garland or table decor.
The frame is where most DIY arches succeed or fail. A balloon strip, which is a long plastic ribbon with holes, is the simplest option. Inflate balloons to slightly different sizes, then push the tied ends through the holes, alternating colors and sizes as you go. For a fuller look, attach a second strip alongside the first and offset the balloons so they fill the gaps. If you're building a freestanding arch, bend a length of chicken wire or a pool noodle into shape and secure it to a weighted base before adding balloons.
Don't inflate every balloon to the same size. Uniform balloons look flat and manufactured, while slight variation creates depth. Keep a hand pump nearby, since blowing up dozens of balloons by mouth is exhausting and inconsistent. A small electric pump is worth the investment if you plan to make arches more than once.
Assembly Tips and Finishing Touches
Work from the bottom up when attaching balloons to the frame. The base needs the most support, so cluster the largest balloons there and taper to smaller ones near the top. Step back every few minutes to check the shape from a distance. It's easy to get lost in the details up close and miss a lopsided curve.
Once the balloons are in place, tuck in greenery, paper flowers, or streamers to hide any visible frame or strip. This is also your chance to add texture. A few dried palm leaves, eucalyptus sprigs, or crepe paper fans can transform a simple balloon arch into something that looks intentionally styled rather than thrown together.
Finally, test the arch before the event. Gently press on it, check that the base is stable, and make sure nothing is rubbing against a sharp edge. Latex balloons deflate slowly, so build the arch the same day if possible. If you must build it earlier, keep it out of direct sun and away from heat sources. With a solid frame and a little planning, your arch will hold strong all day.


Author

22 feb,2025
This incident opened my eyes to the value of Insurance in general, so I decided to examine my personal and business insurance.


Comment (3)
The payments are made directly from one person to another without passing through a central bank or clearing house.
22 feb,2025
ReplyStyling a Dessert Table That Photographs Beautifully
23 feb,2025
ReplySeasonal Garland Ideas for Every Month of the Year
23 feb,2025
Reply